Setting up a smooth and efficient development environment can be challenging, especially when juggling multiple projects, tools, or environment limitations. This is where Docker containers come in, offering a streamlined way to manage dependencies and isolate project-specific setups. By running SQL, Redis, and other services in Docker containers, you can avoid cluttering your local machine with different installations. Docker Desktop makes it easy to quickly spin up these isolated environments, allowing you to keep configurations neat and separate for each project. This flexibility transforms your local setup into a powerful, adaptable workspace, perfect for experimentation and focused development.
Recently, I was working with a client developing a cloud-hosted web application that required SQL Server and Redis cache. Normally, we would connect to cloud instances in a development environment. However, the development workstation the client provided was restricted by their firewall, preventing access to the necessary cloud resources, specifically SQL Server (port 1433) and Redis cache (port 6379).
In the past, we worked around this problem by running SQL Server and Redis as Windows services. This method posed its own issues, including the installation footprint of SQL, maintenance, and keeping these services up to date.
Enter Docker and containerization. Both SQL Server and Redis are available as container images that can be run in Docker Desktop on your development workstation. When needed, just start the container in Docker. Here’s how to set this up:
Install Docker
Install and start Docker Desktop from https://www.docker.com/.
Install Redis
Retrieve the Redis image from Docker Hub using the command line:
docker pull redis
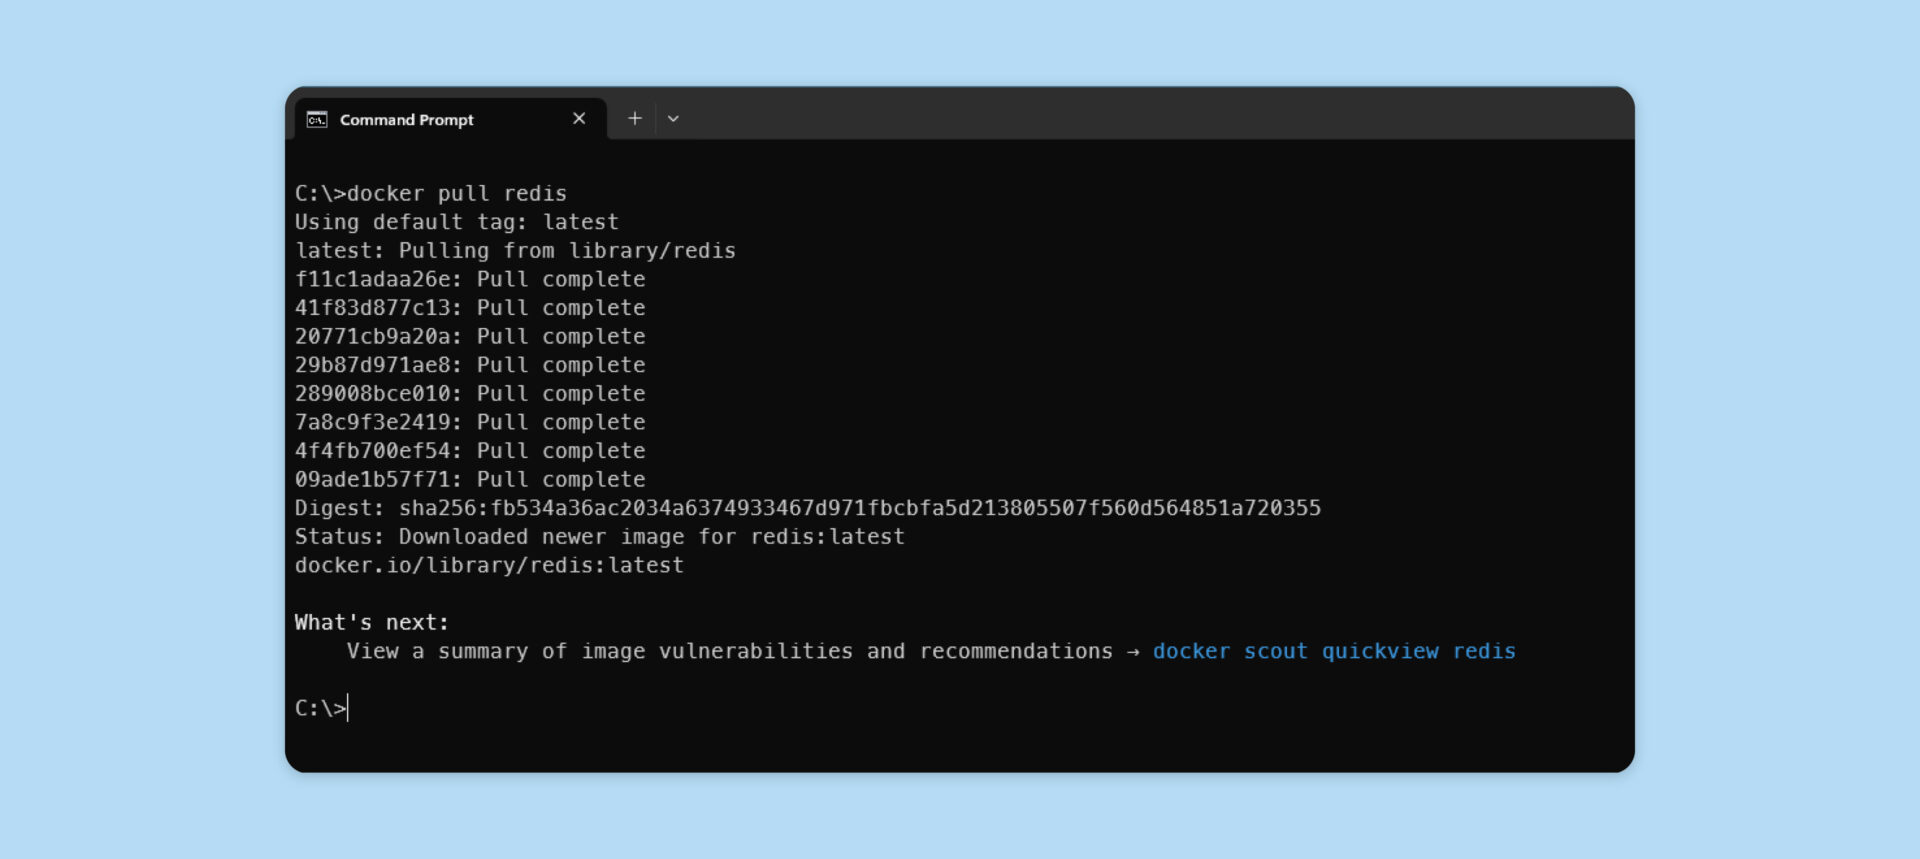
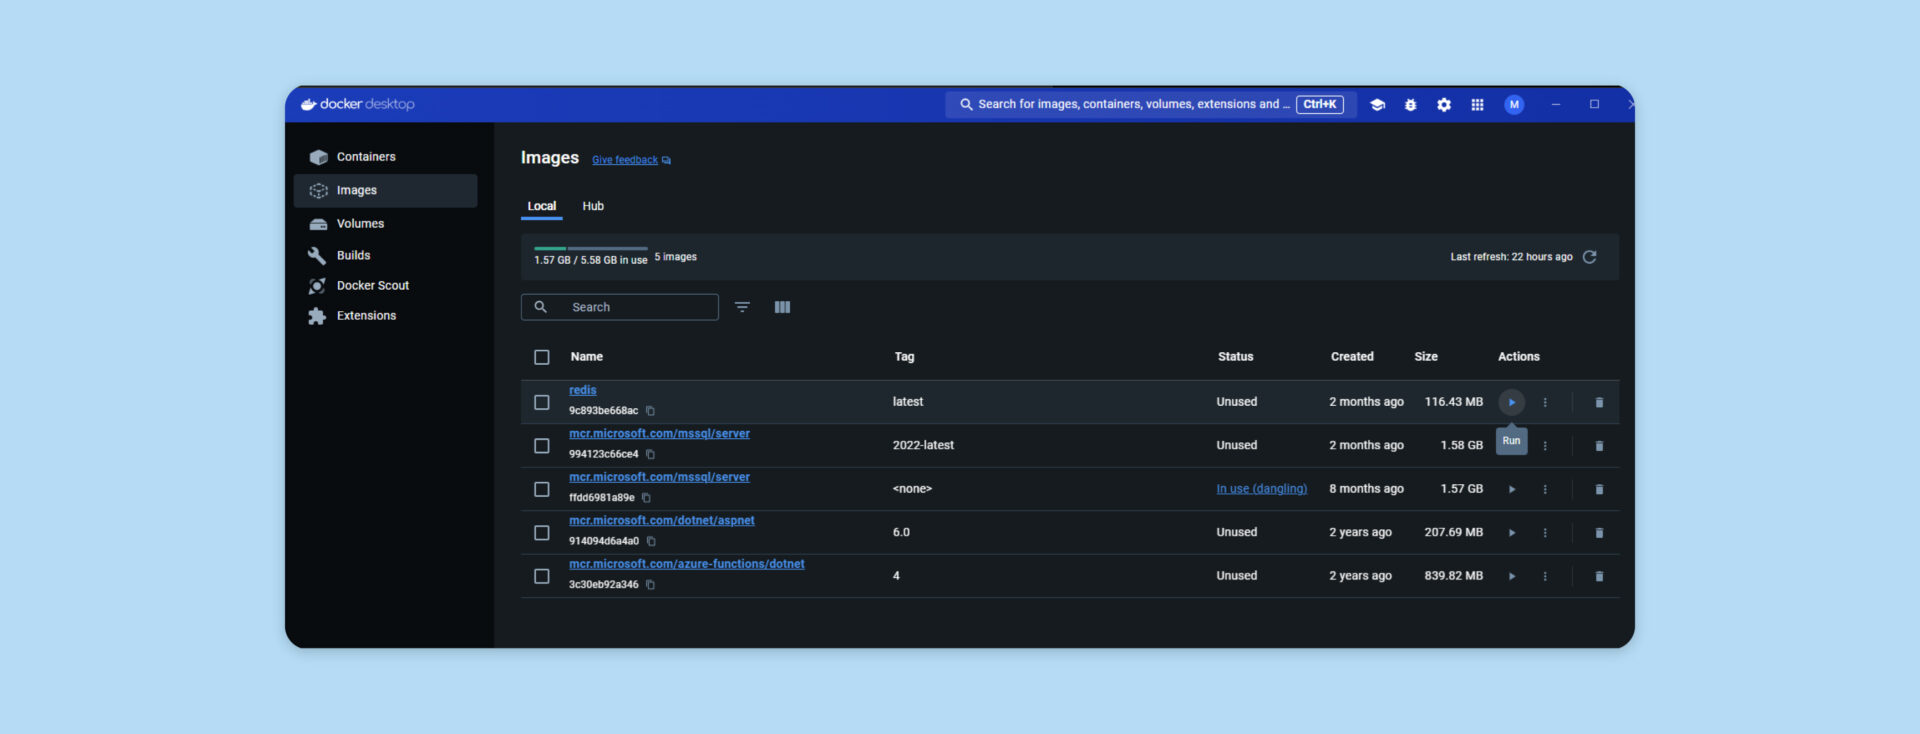
Switch to Docker Desktop and select the Images tab. You will see “redis” listed; click the Run action.
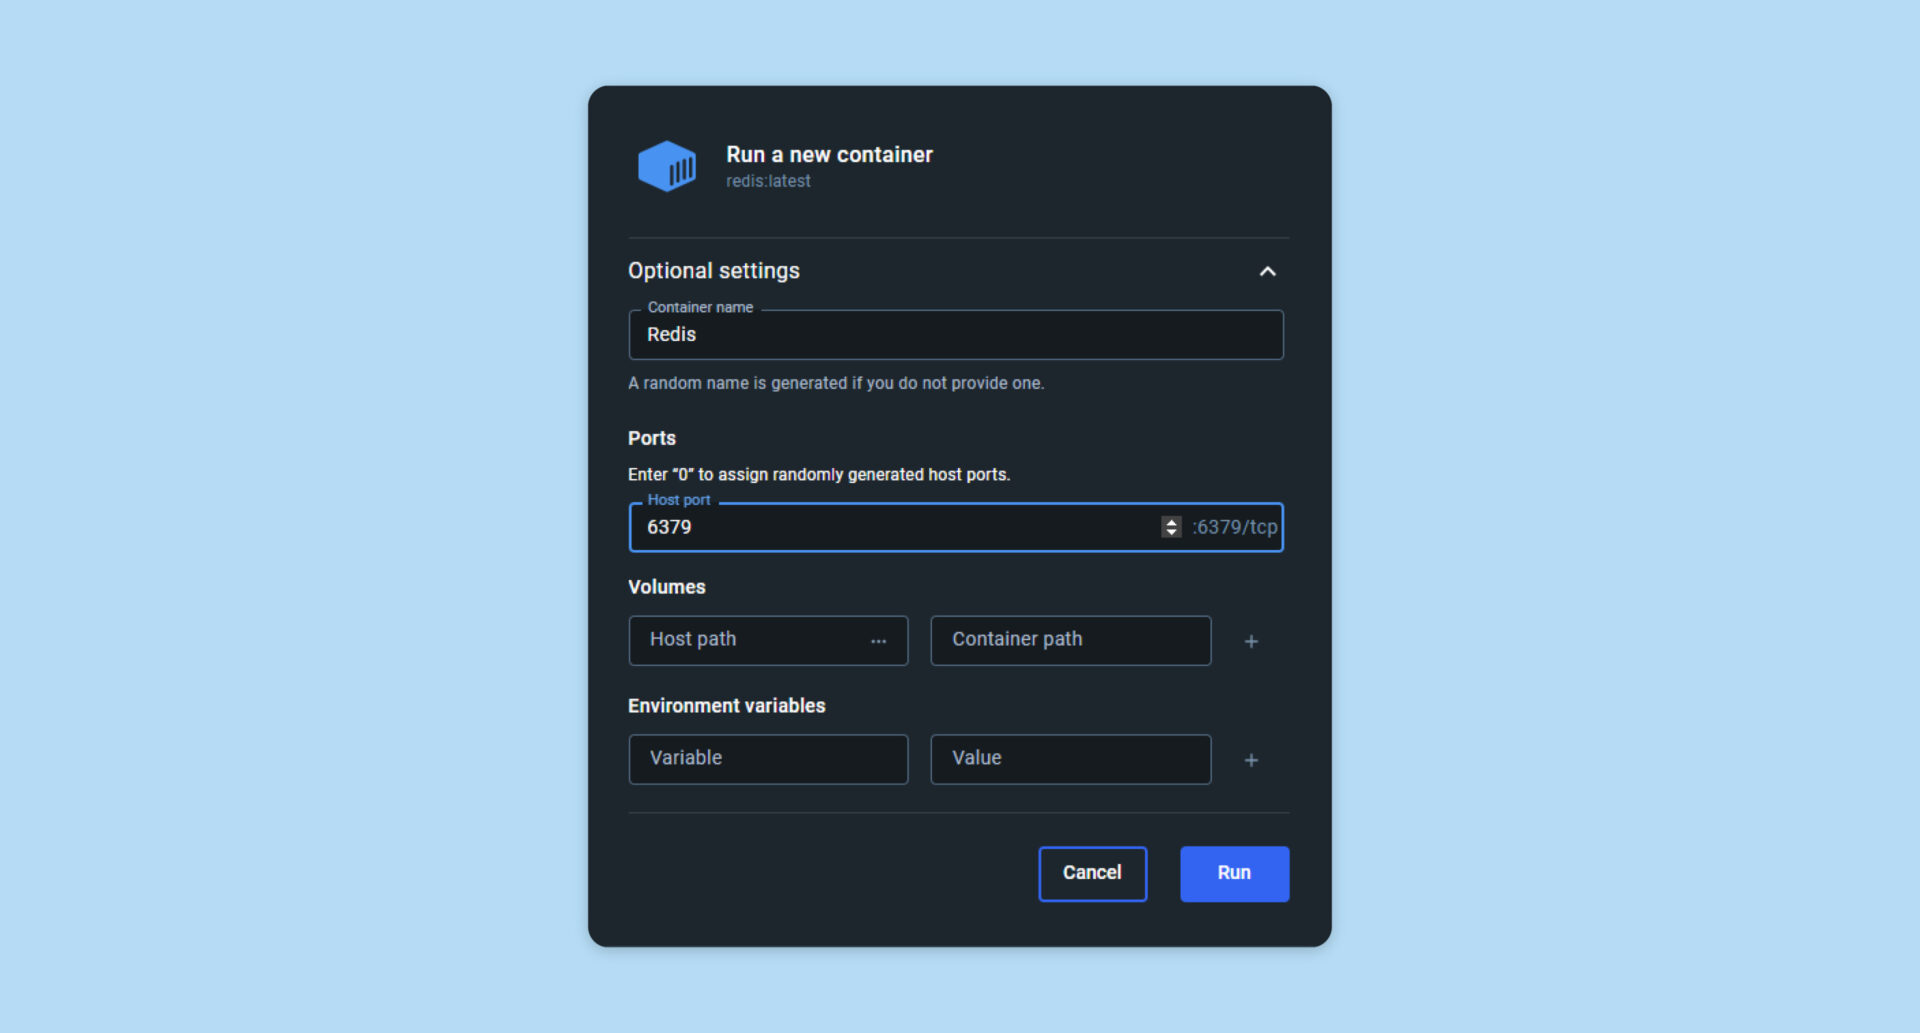
You will be prompted to run a new container. Name the container “Redis,” enter Host port 6379, and click Run.
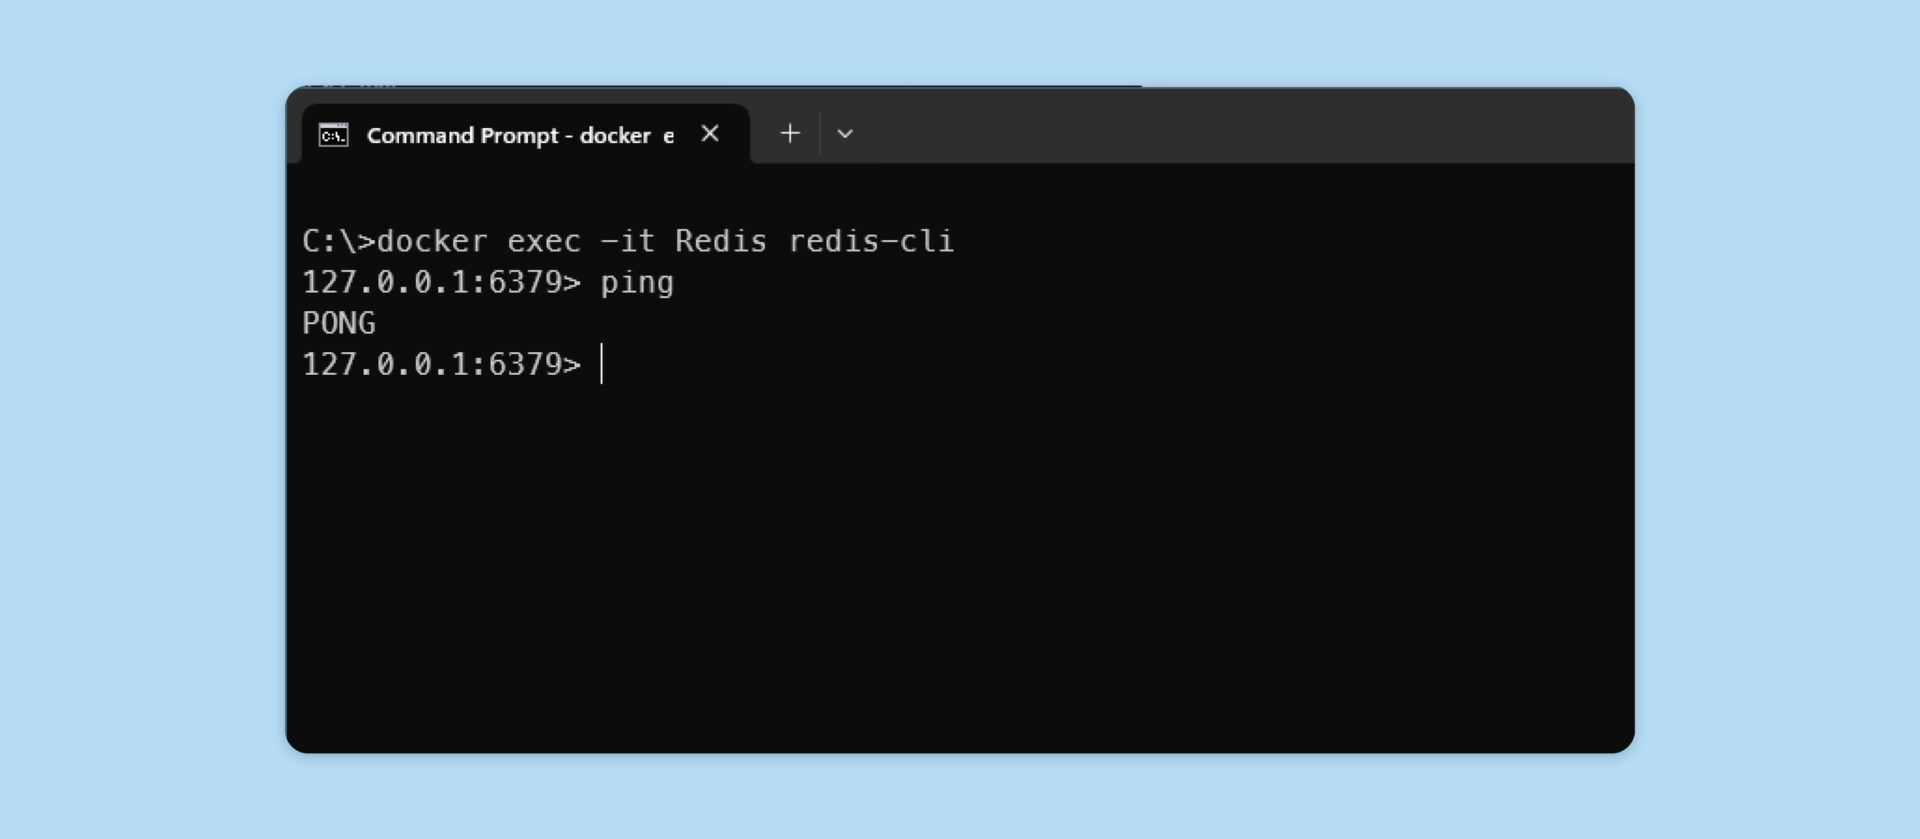
Verify the connection to Redis by switching back to the command prompt and issuing the command:
docker exec -it Redis redis-cli
followed by:
ping
Redis will reply with “PONG.” Redis is now ready to use.
Install SQL Server
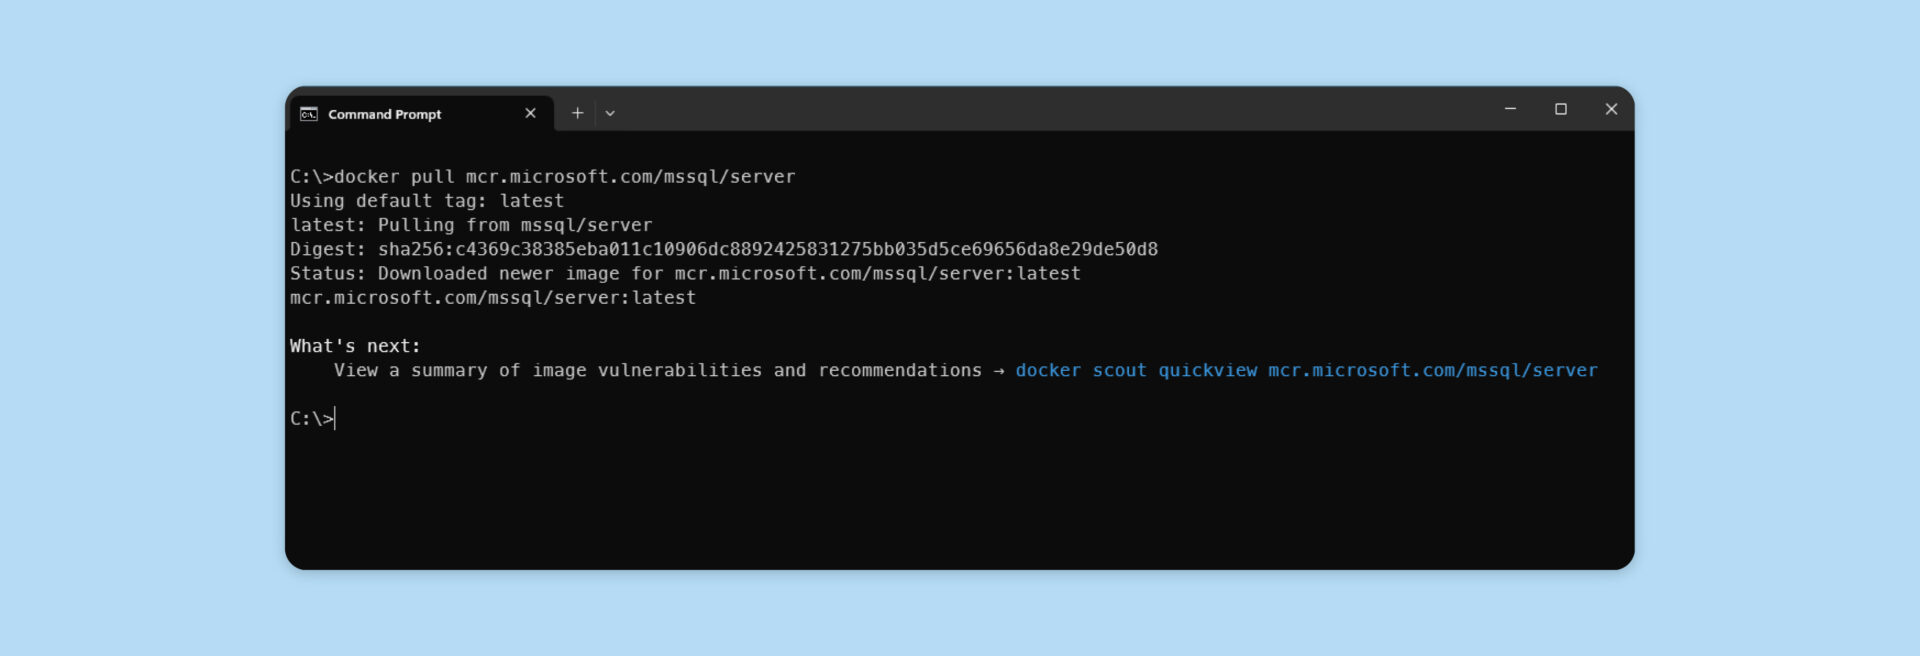
Retrieve the SQL Server image from Docker Hub using the command line:
docker pull mcr.microsoft.com/mssql/server
Initialize SQL using the Docker command line. Note that the SA password must meet SQL security requirements. The name will be the container name assigned in Docker Desktop:
docker run -e “ACCEPT_EULA=Y” -e “SA_PASSWORD=Password1234!” -p 1433:1433 –name SQLContainer -d mcr.microsoft.com/mssql/server:2022-latest
Switch back to Docker Desktop and select the Containers tab. Click the Run action next to SQLContainer.

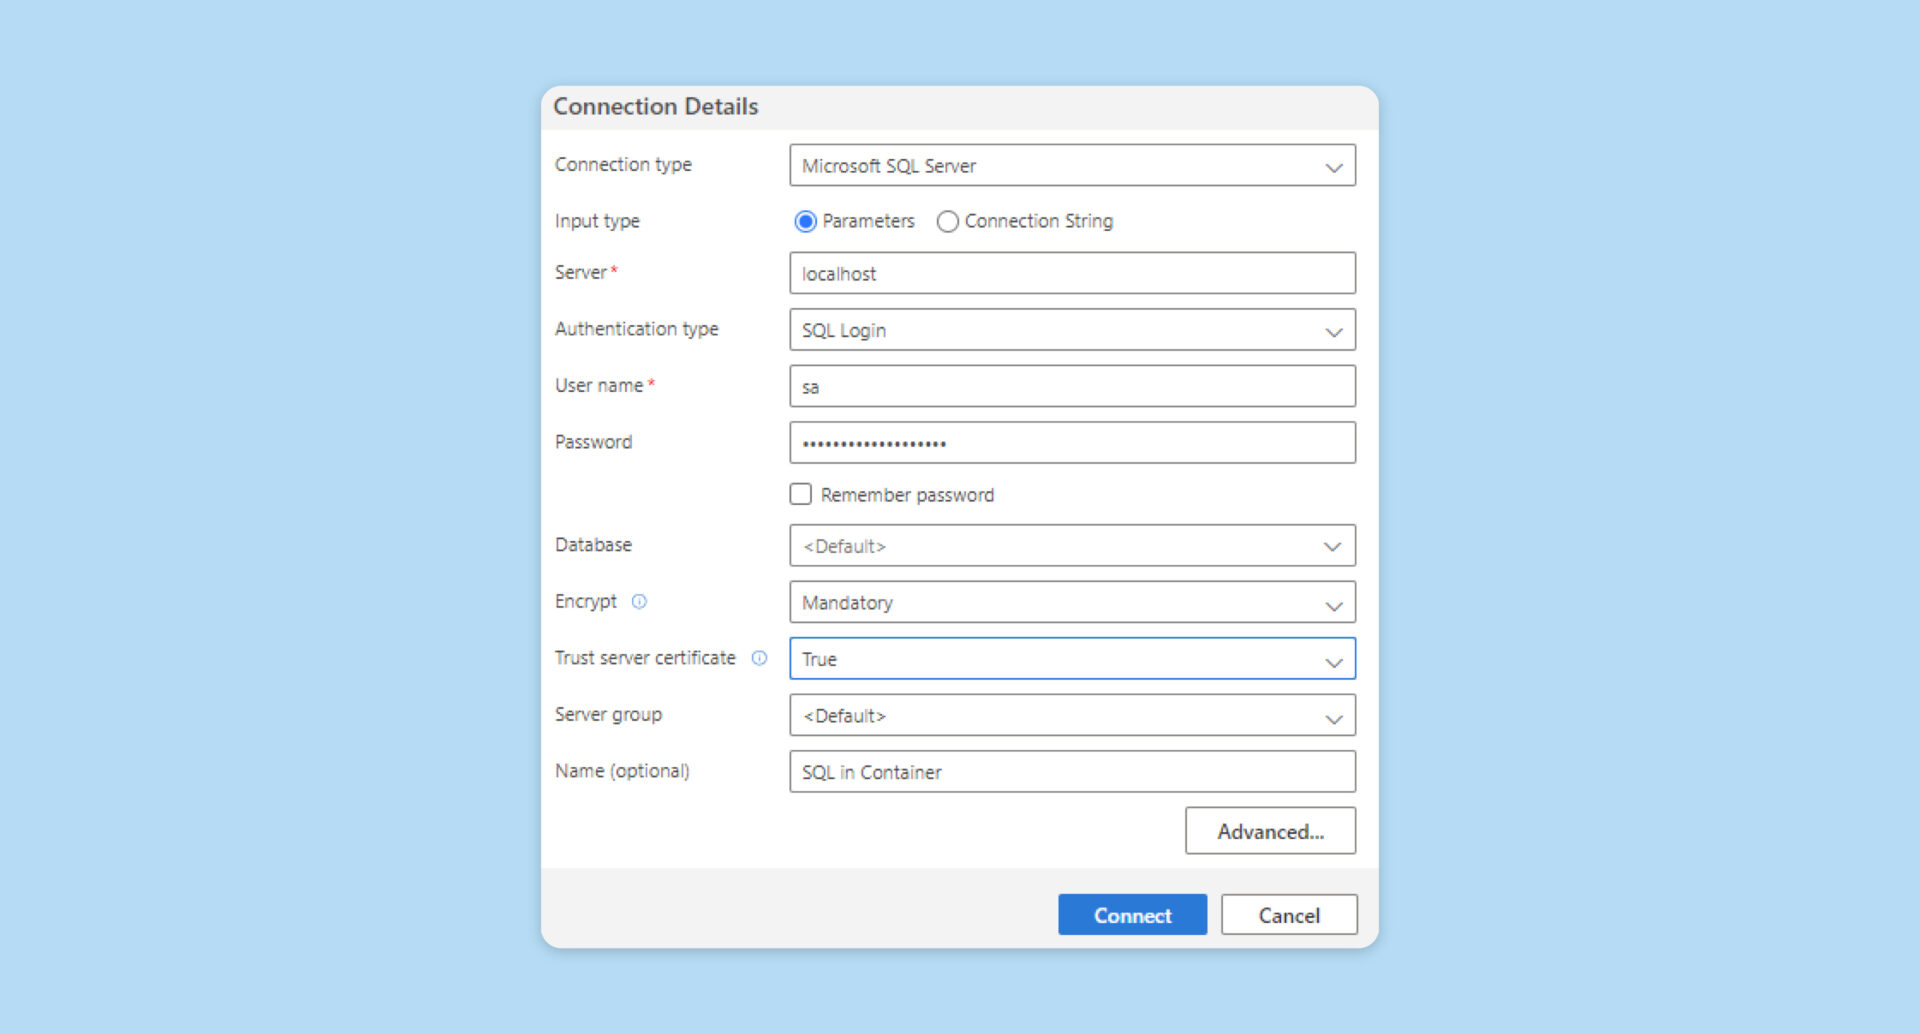
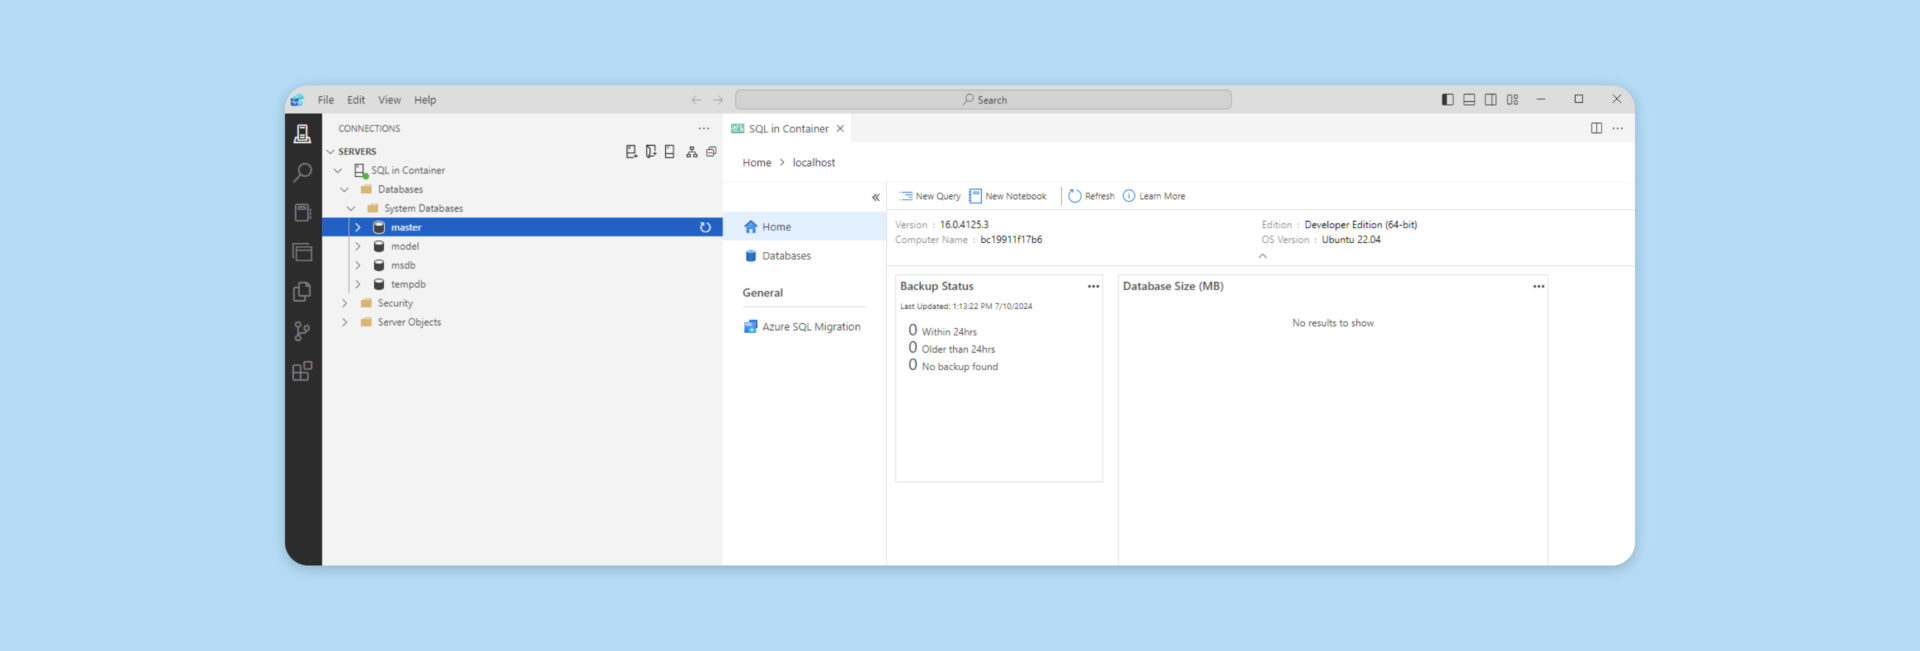
Verify the connection to SQL Server using a tool such as Azure Data Studio or SQL Server Management Studio (SSMS). In this example, I use Azure Data Studio.
Connect Using Your Application
Once your containers are running, you can reference SQL and Redis in your application’s connection strings as localhost (SQL: port 1433, Redis: port 6379).
Get Started with Docker
Using Docker Desktop to run SQL and Redis containers makes local development much easier and cleaner. Instead of cluttering your machine with various installations, you can spin up isolated, project-specific environments in no time. This setup keeps your data and configurations separate, which is perfect if you’re working with multiple clients or projects. Plus, it’s easy to experiment with new tools or settings without worrying about messing up your main system. Once you get the hang of containers, they’ll become an invaluable part of your workflow—helping you focus on building and coding instead of wrestling with setups. Give it a try and see how much smoother your development process can be.